
Google Analytics 4 is the next generation of Analytics, giving you easy insights to your nonprofit website. It may feel a little cumbersome to setup, but it can be done in just five steps.
Setting up a new Google Analytics 4
Step 1: Go to analytics.google.com and create an account, if you haven’t already.
Step 2: Click Admin at the left sidebar, very bottom corner. (And make sure you are in the correct account and property.)
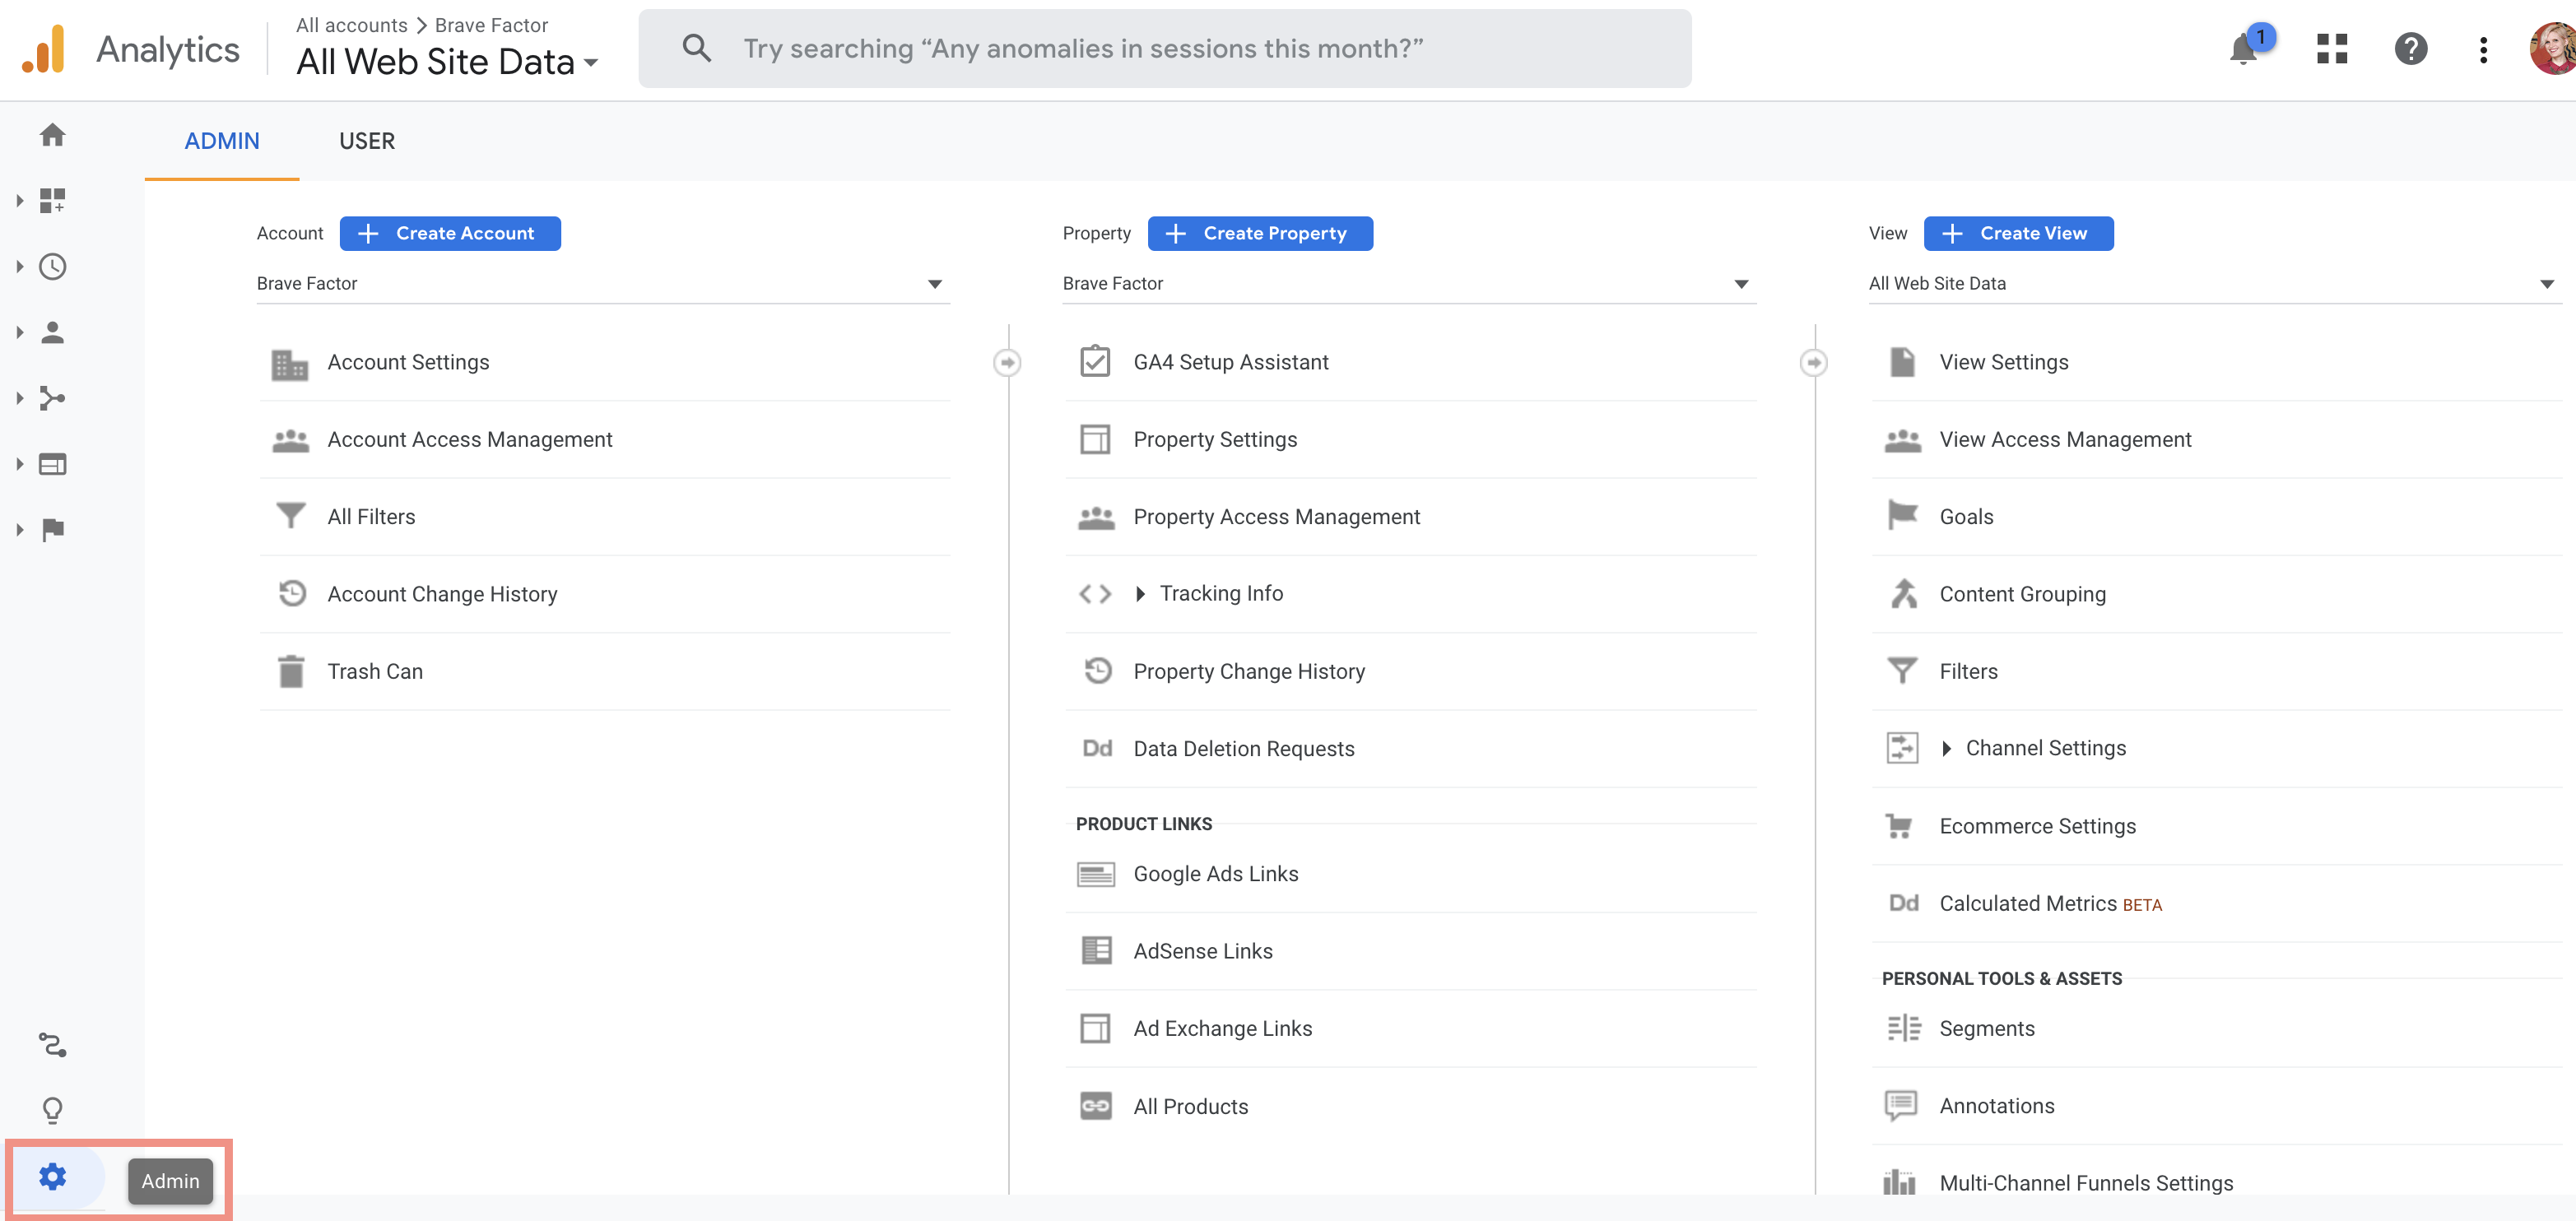
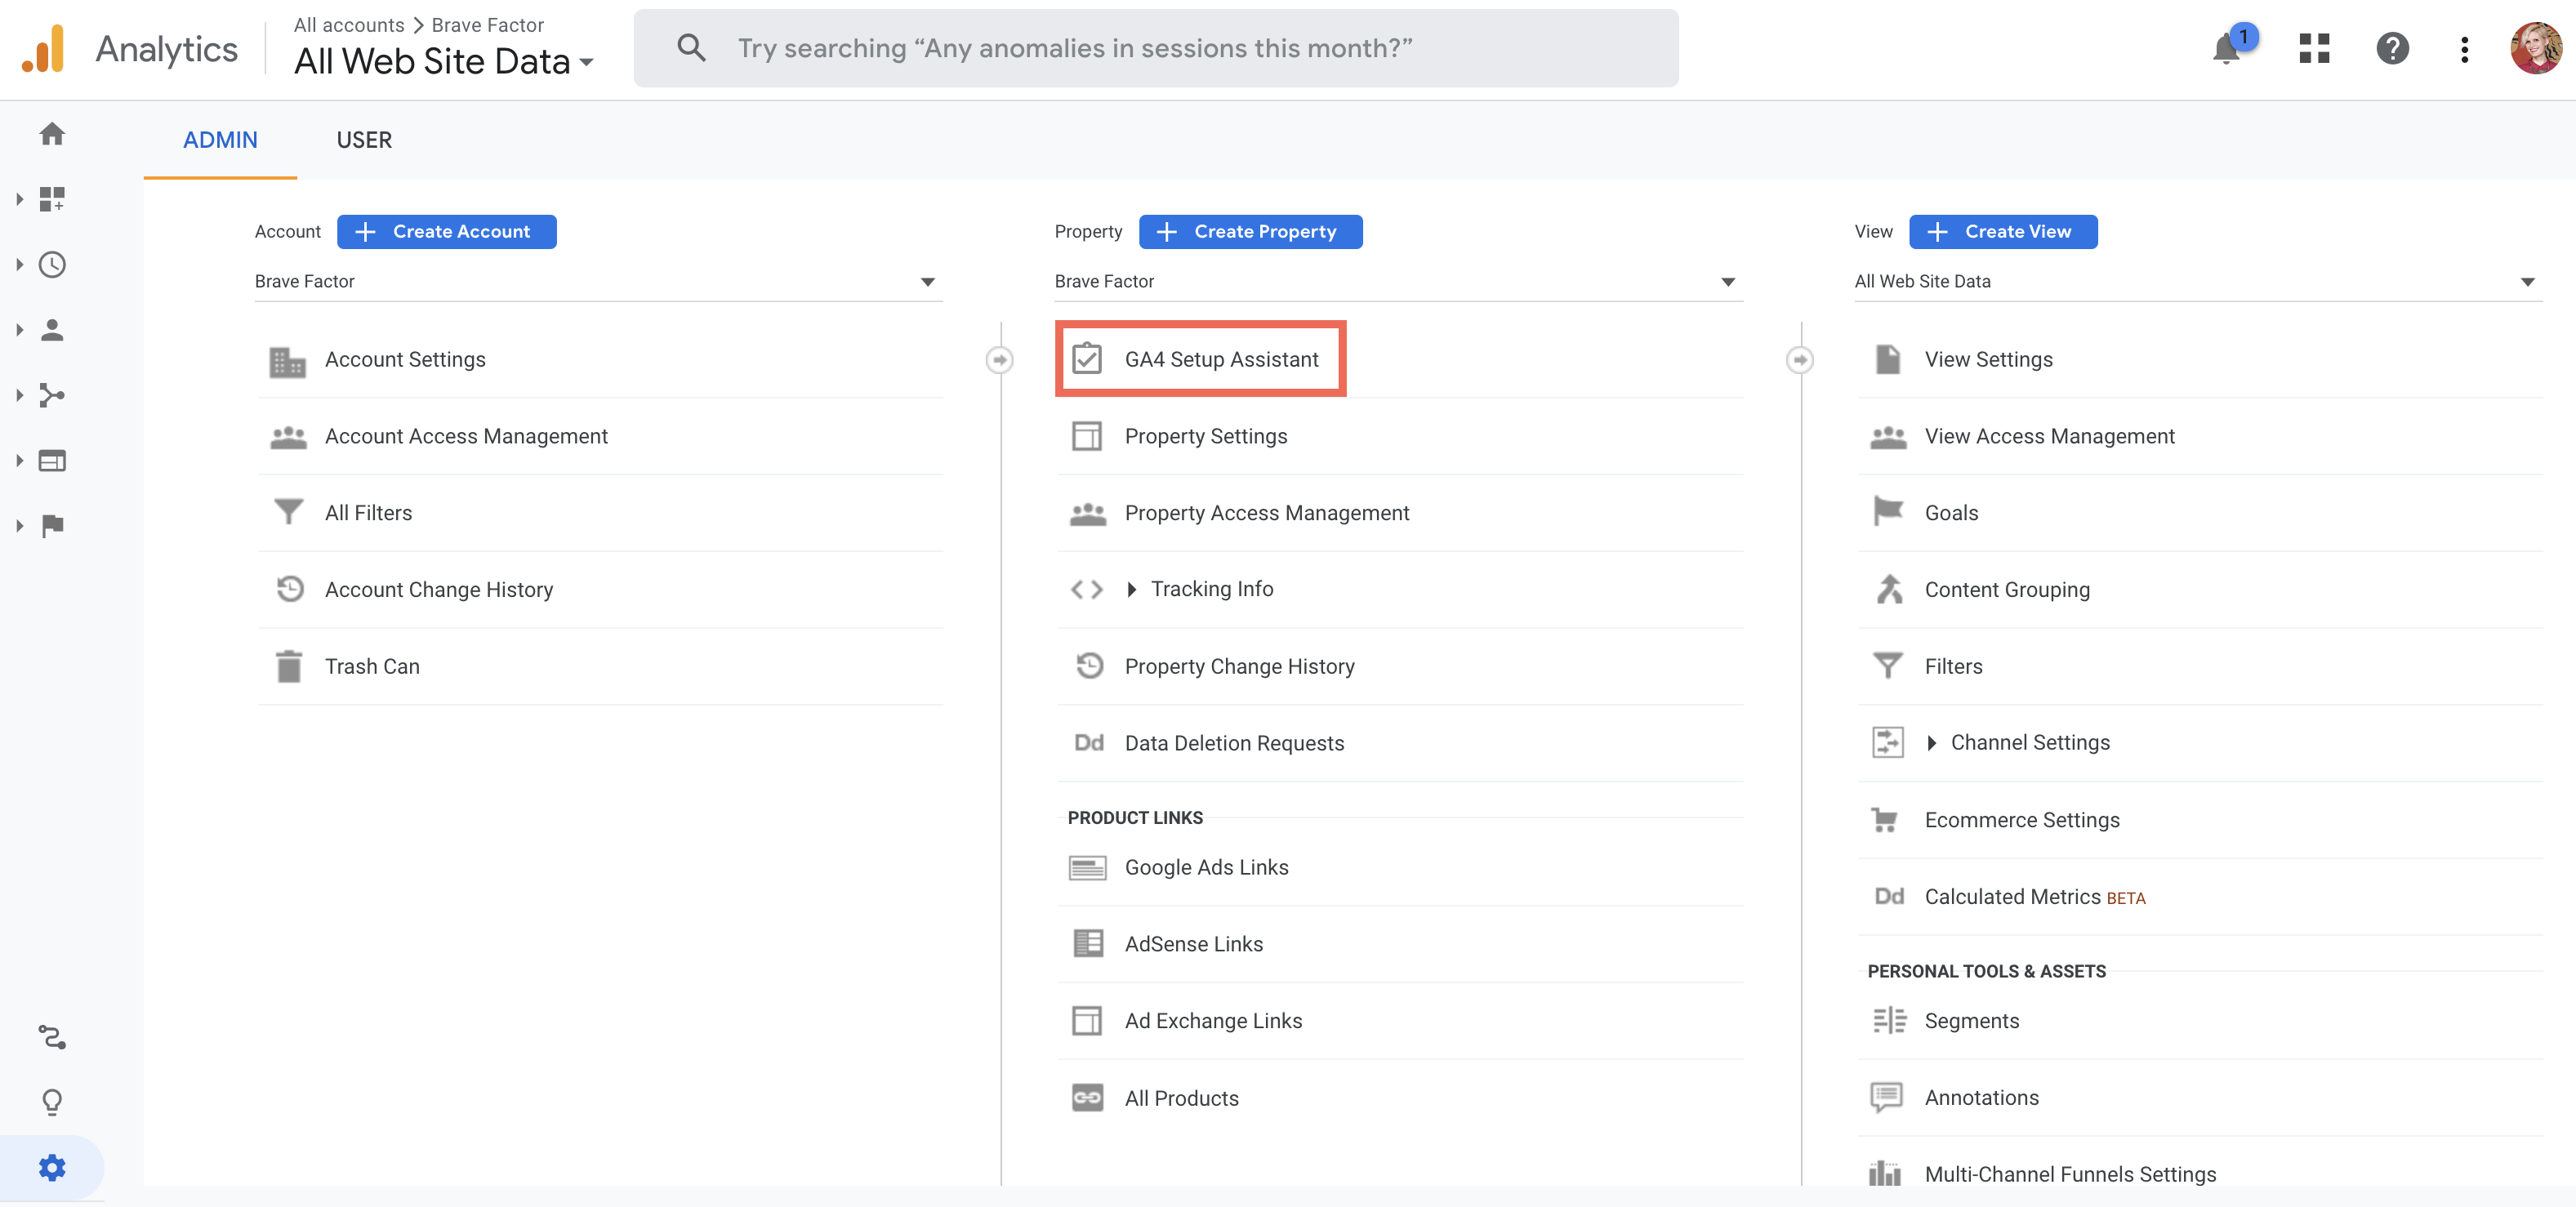
Step 3: In the Property column, click GA4 Setup Assistant.
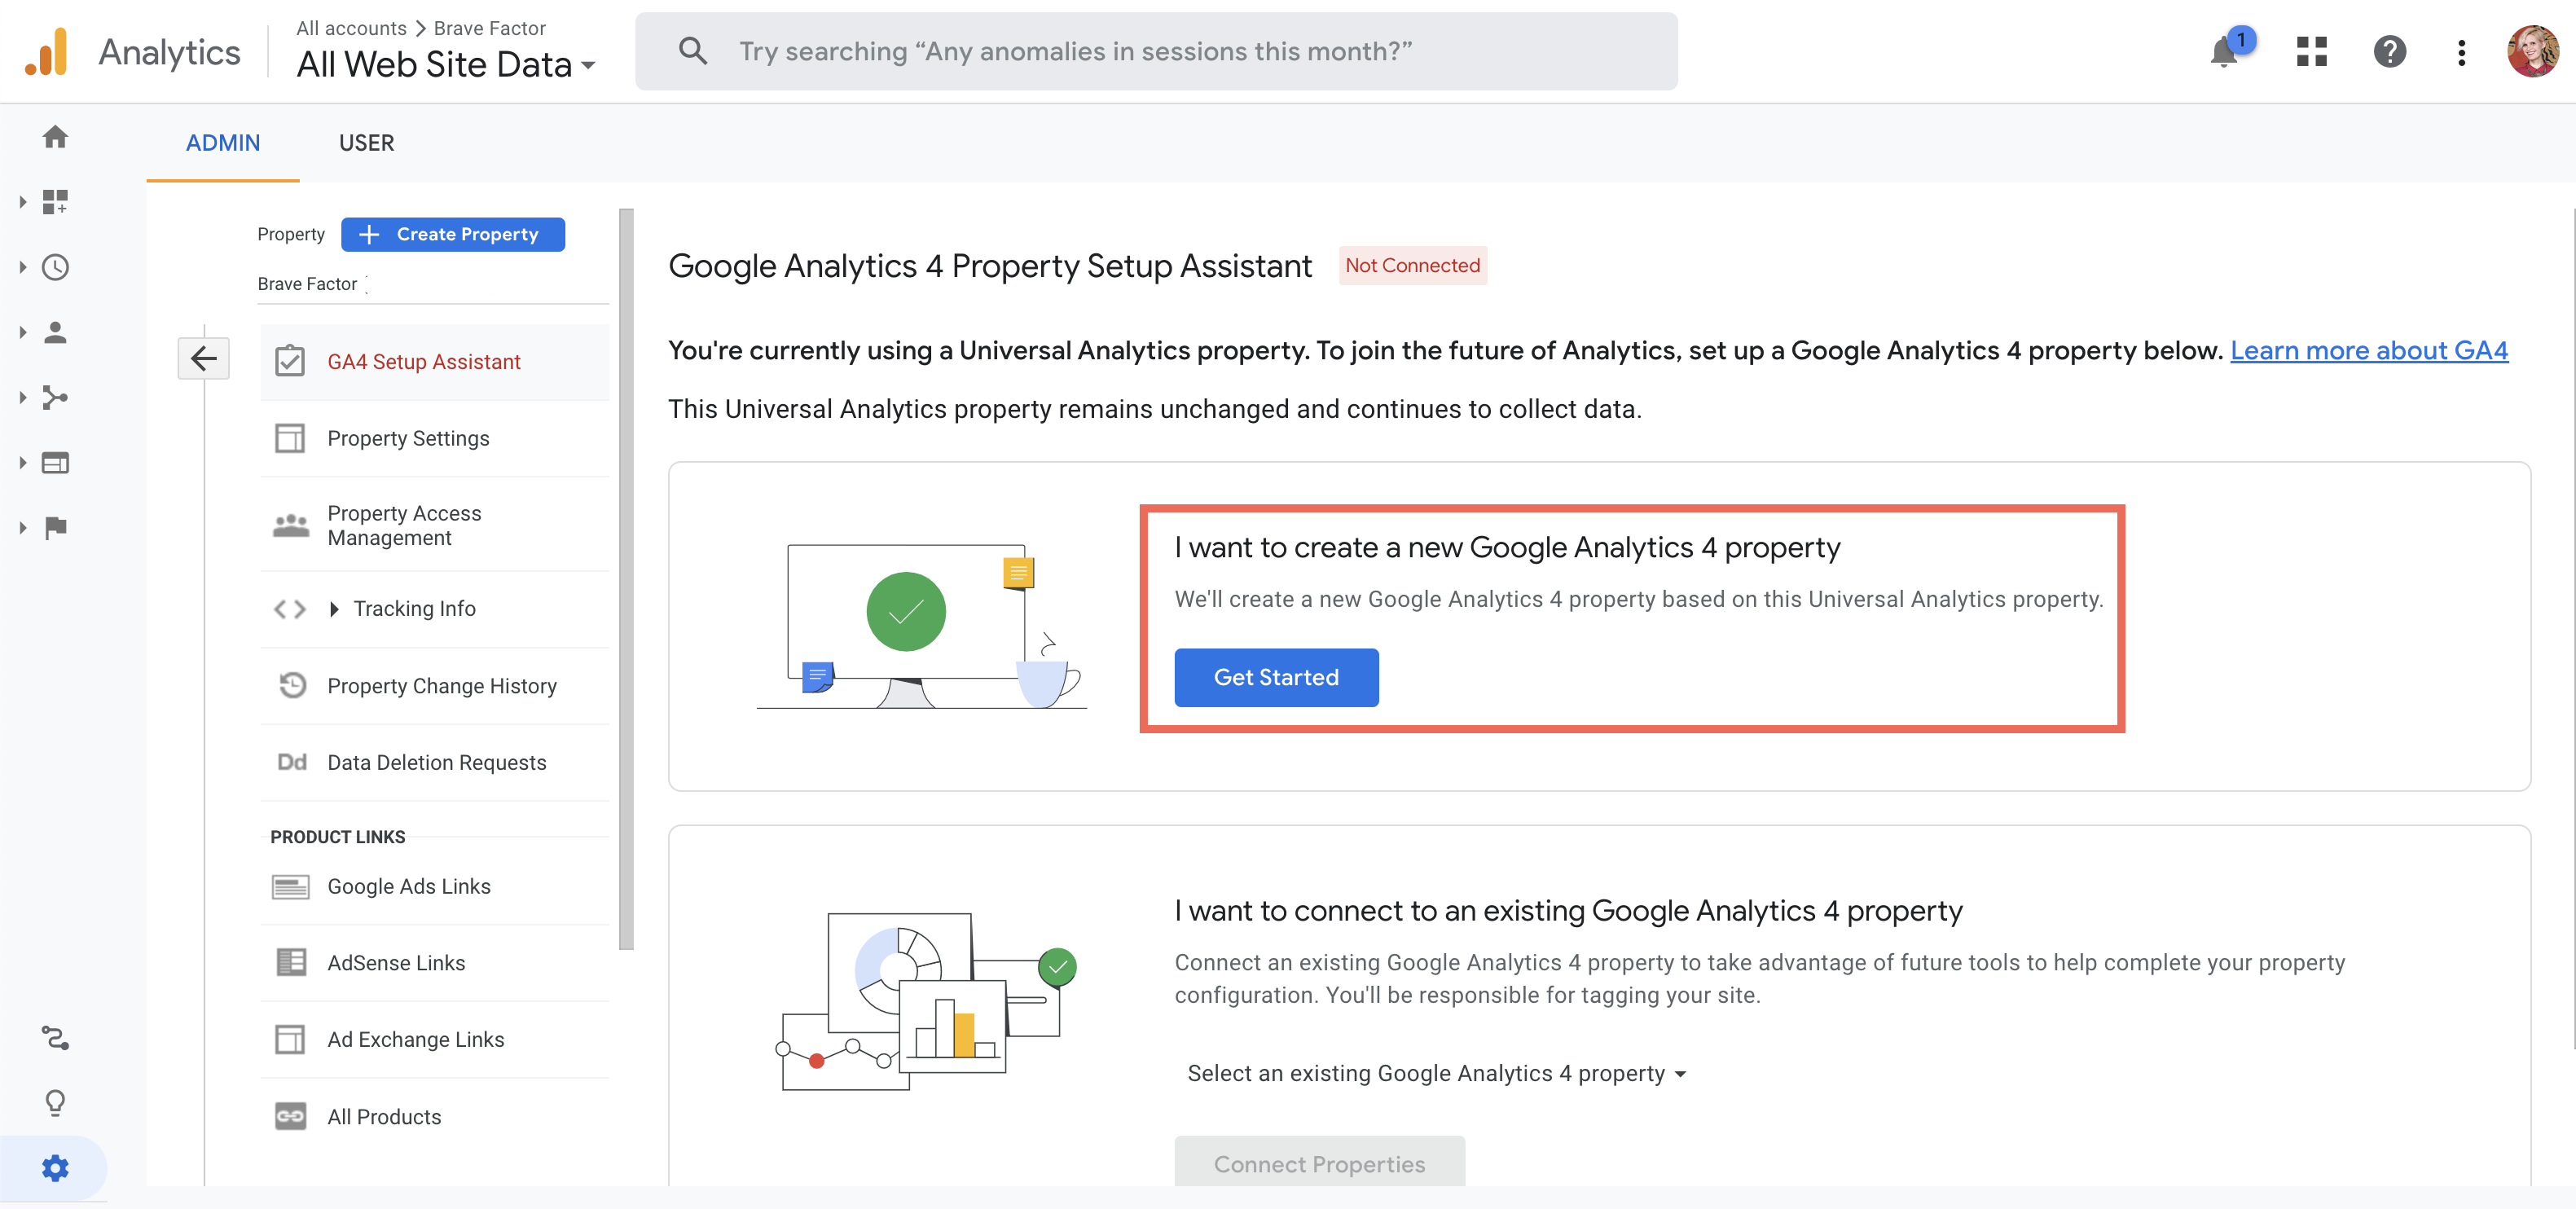
Step 4: In our case, we have the original Google Analytics, so we want to update to GA4. But even if you don’t have anything setup, you can still follow the setup wizard. Follow the setup’s prompts and click Get Started.
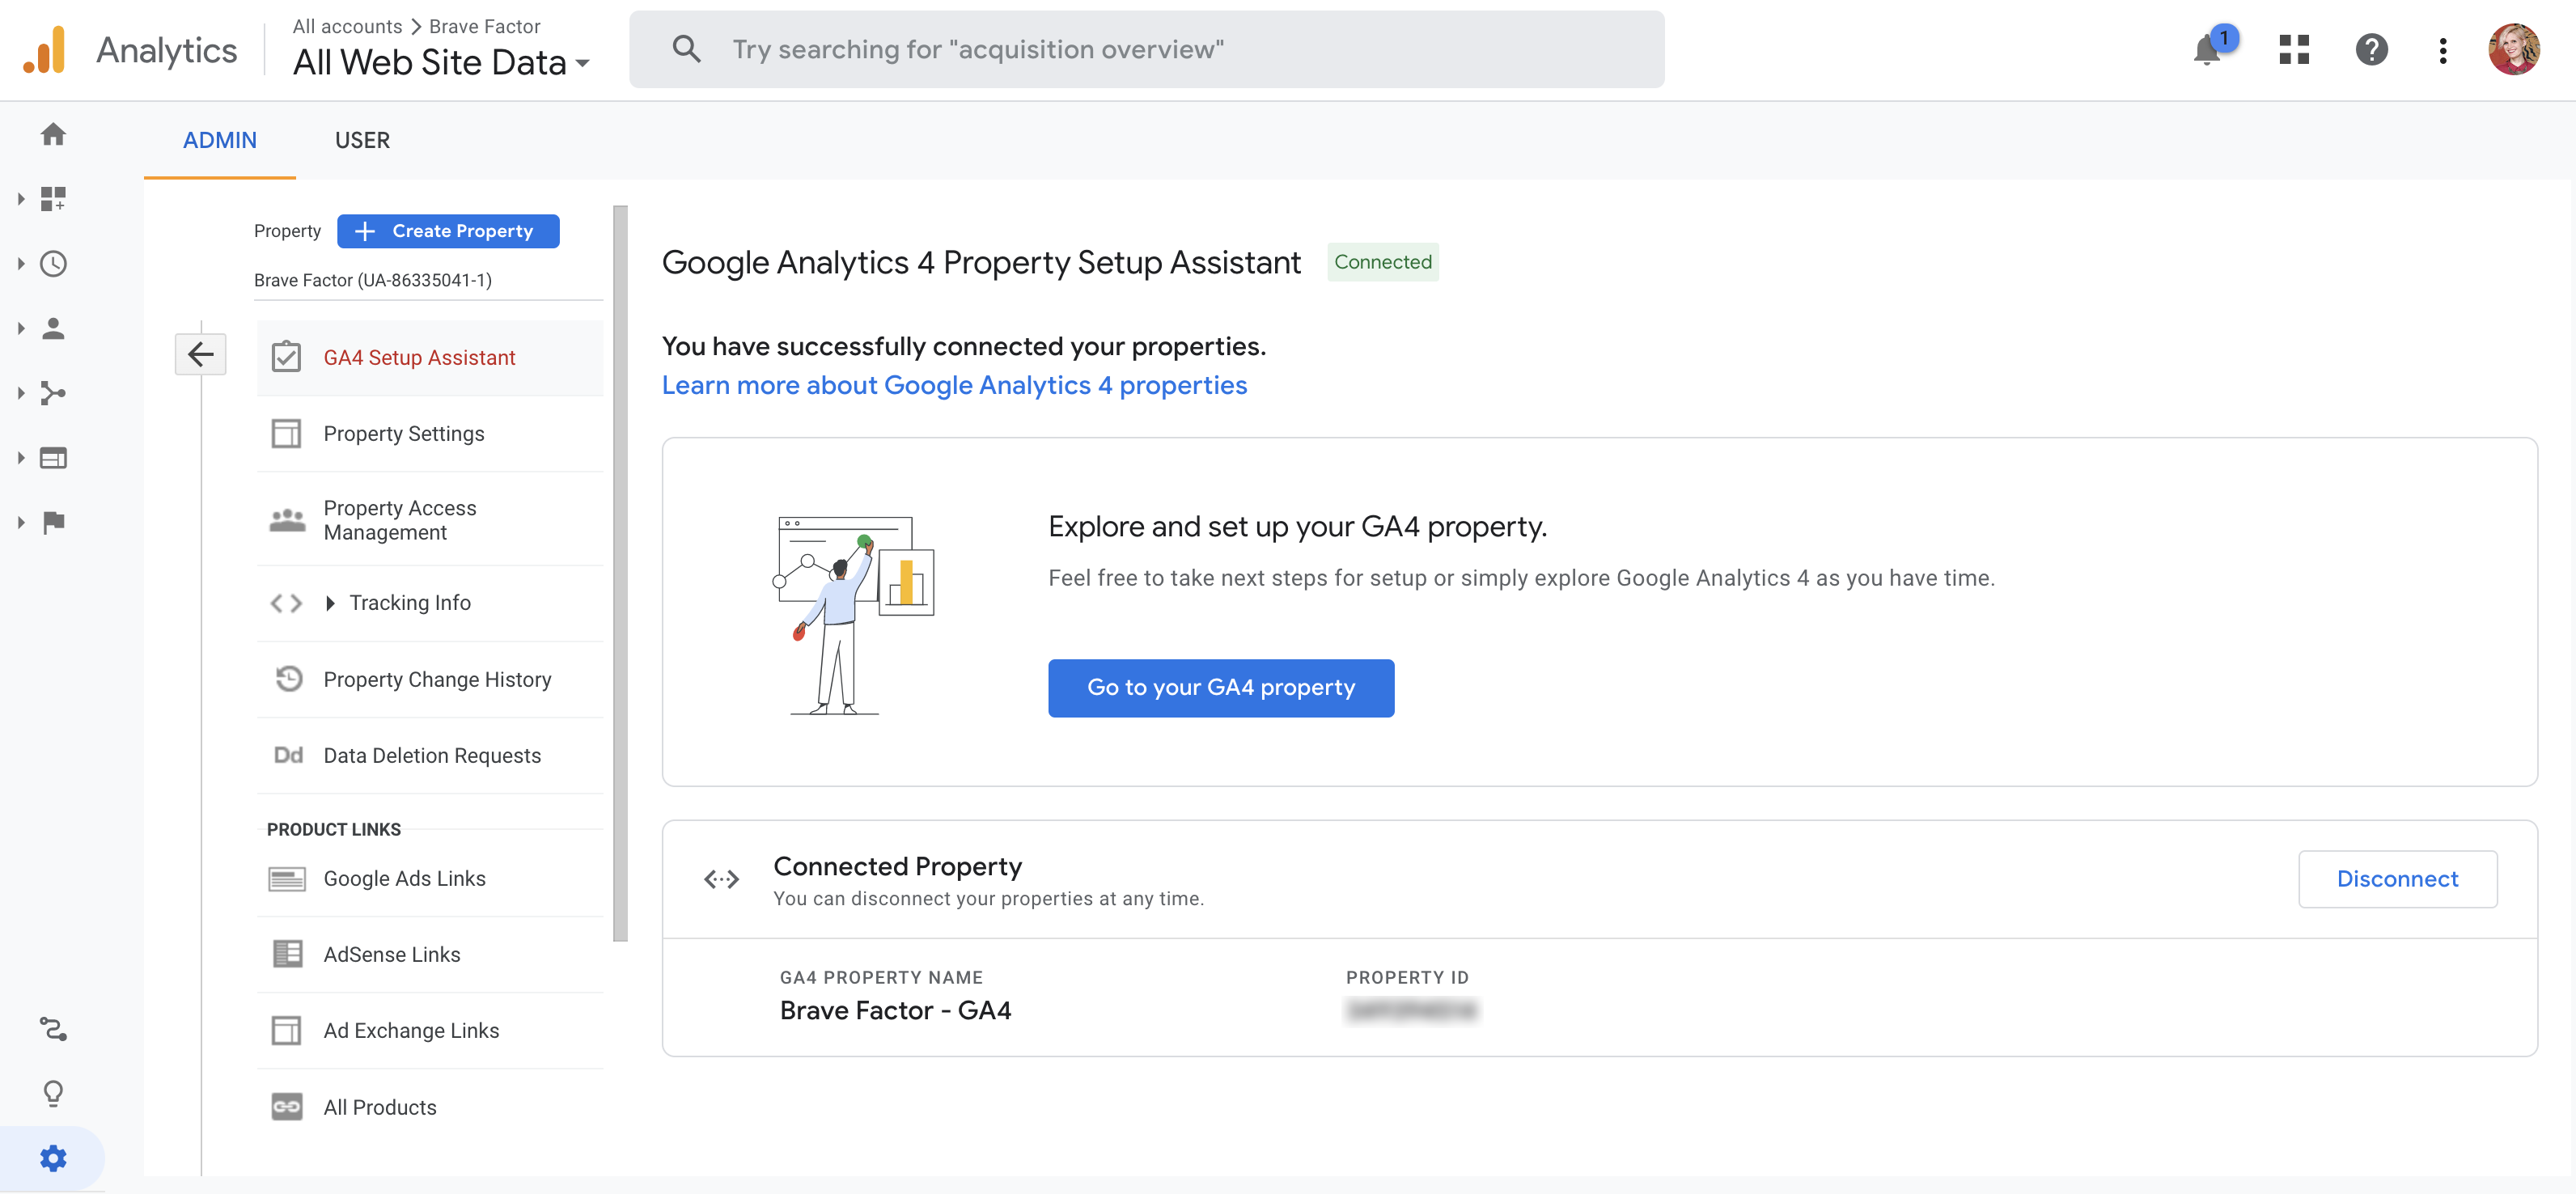
Step 5: After the setup is complete, you will land on a completion page. Many of your reports and explorations can take 24-48 hours to process data from your website or app. After a day or so, just go to your analytics.google.com and see if any data has come in.
To Add a User
You can add as many users as you need. To add a new user to your website’s Analytics, simply:
Step 1: Go to analytics.google.com.
Step 2: Click Admin in the bottom left sidebar’s corner, and navigate to the desired account/property/view.
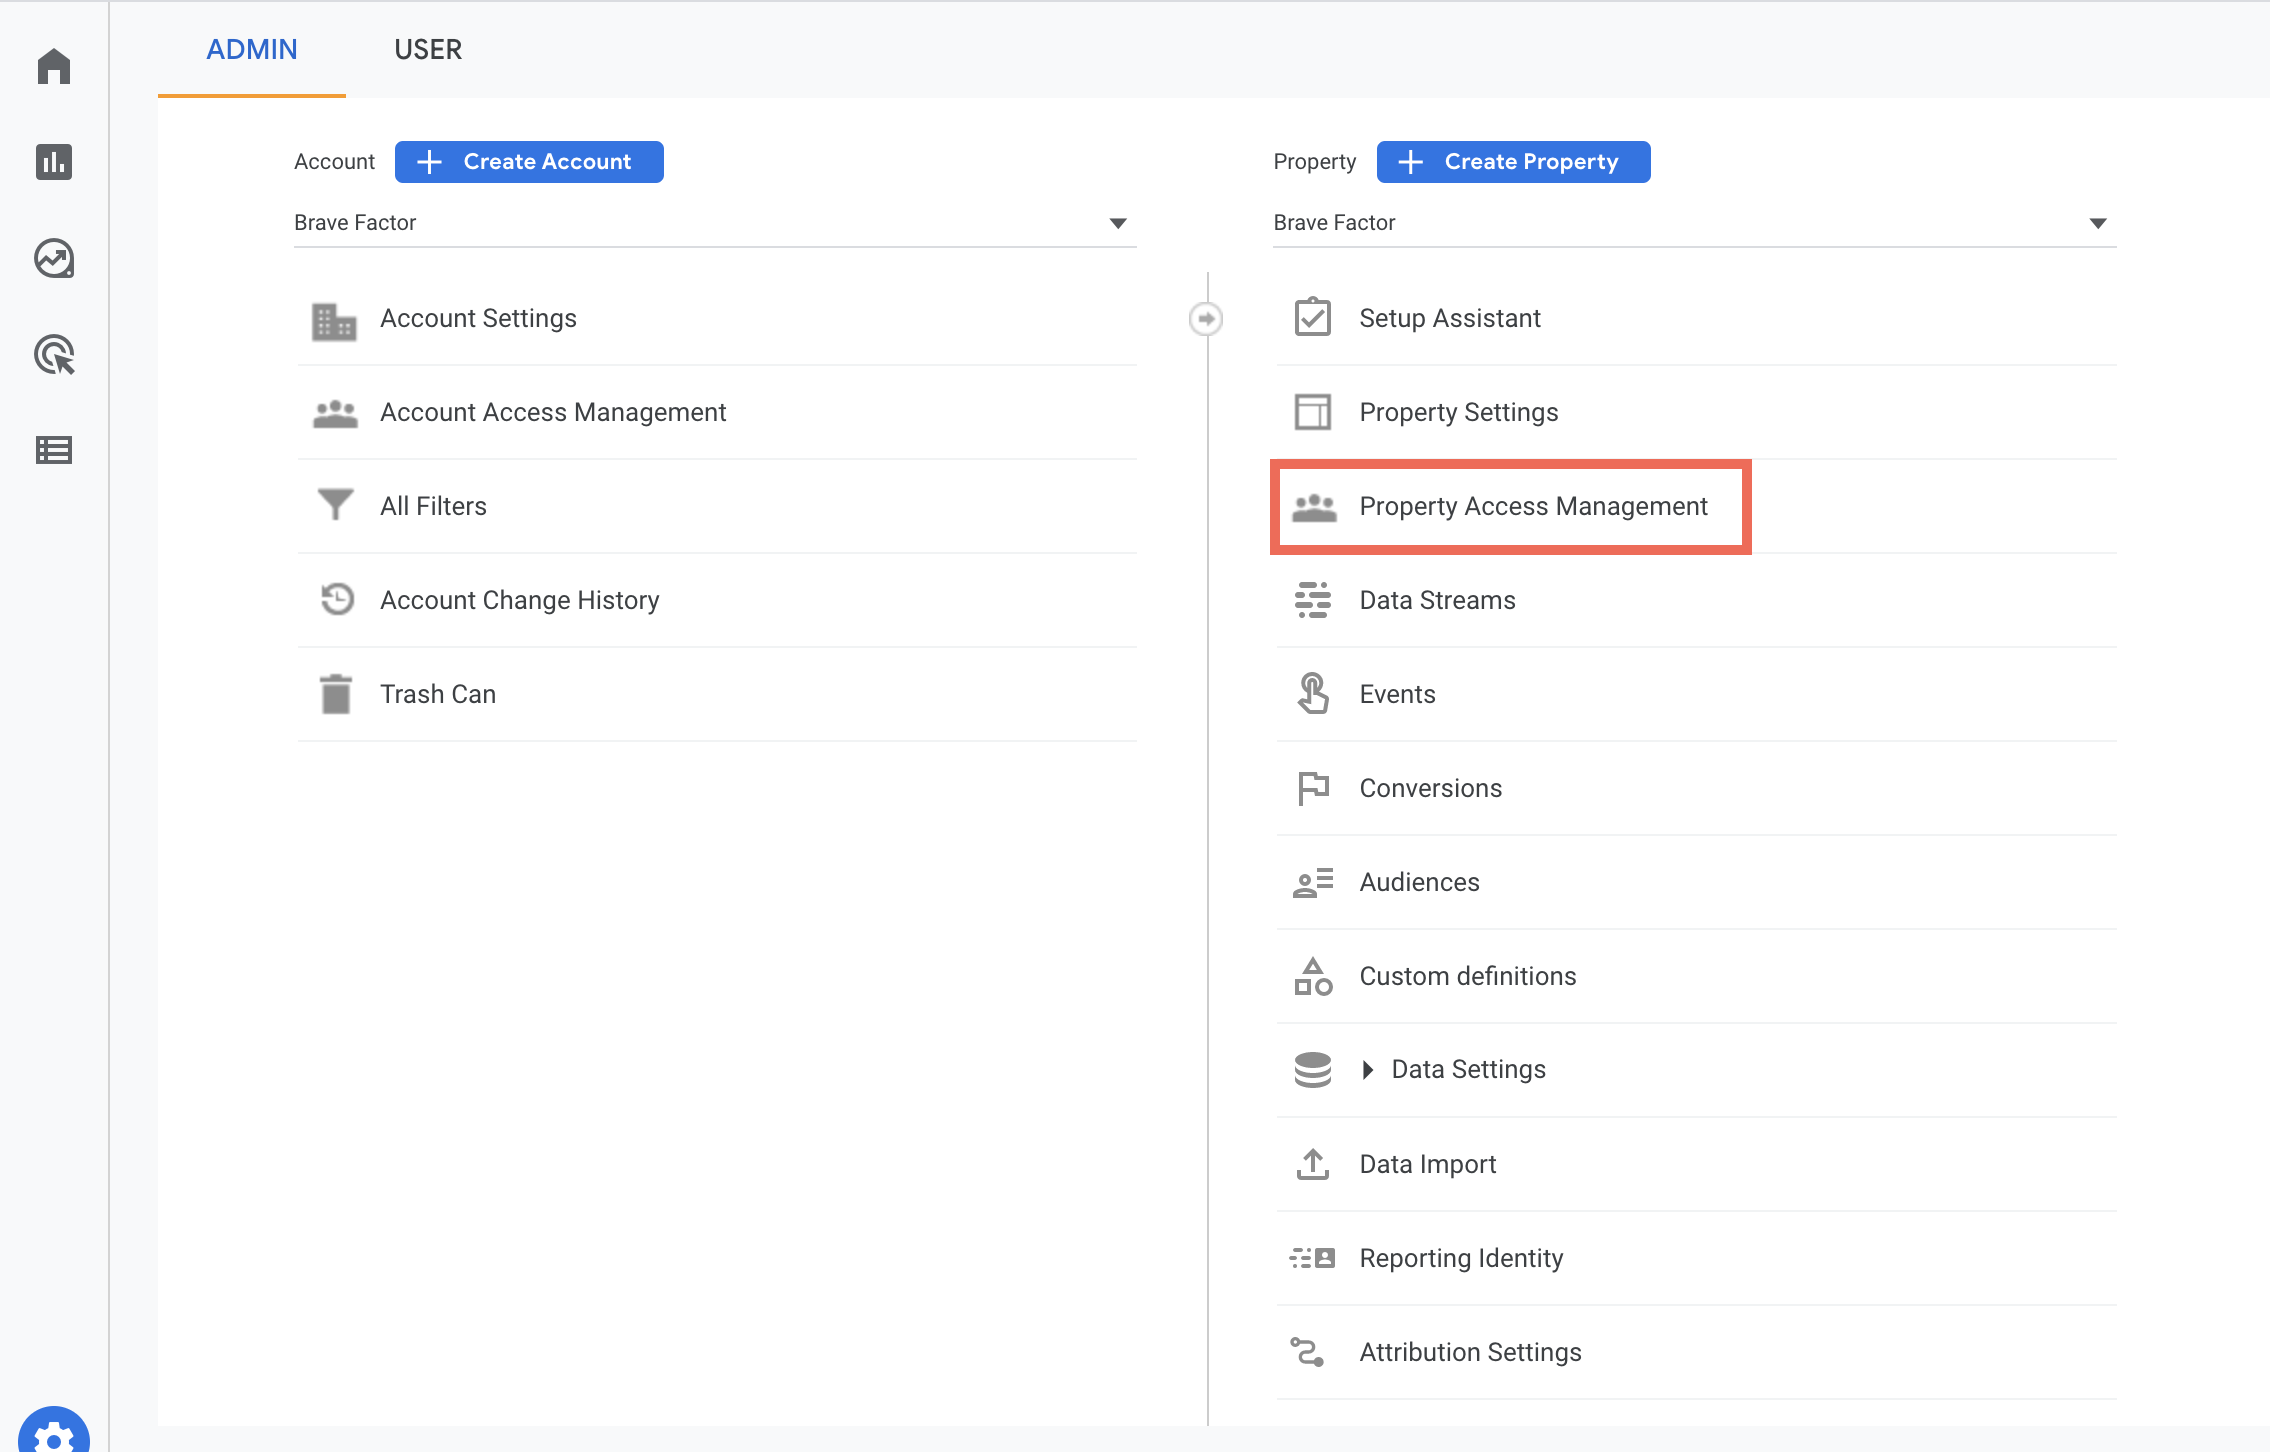
Step 3: In the Account, Property, or View column (depending upon whether you want to add users at the account, property, or view level), click Property Access Management.
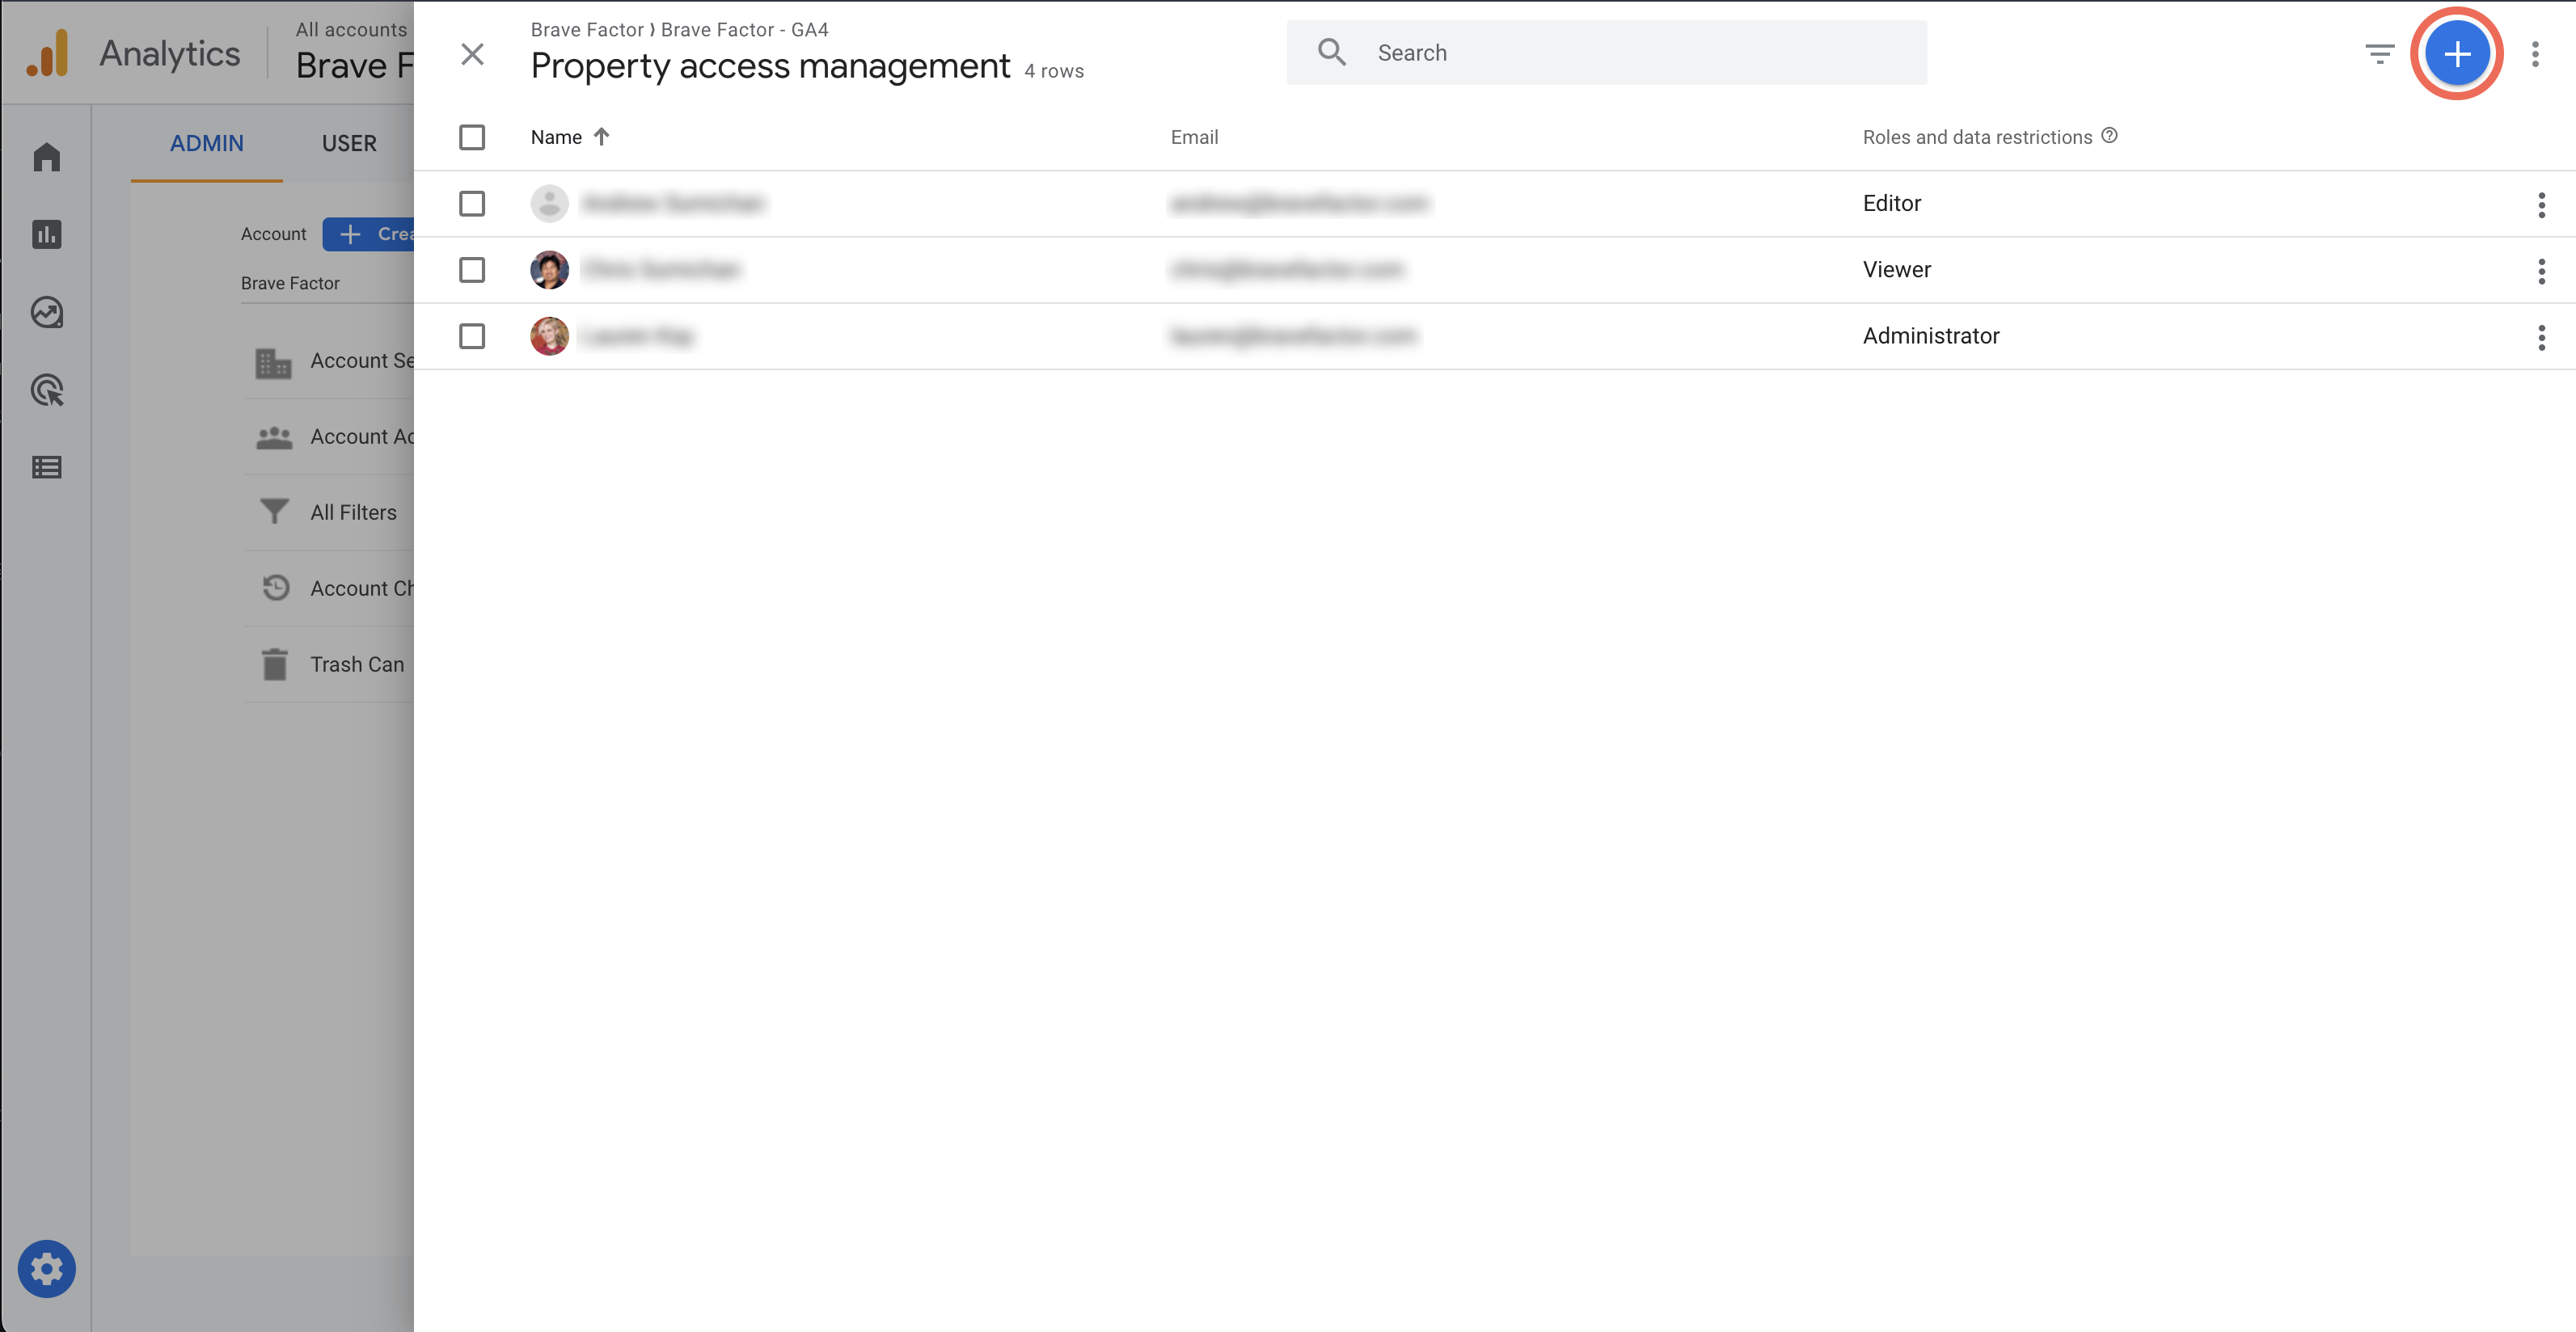
Step 4: In the Account permissions list, click the blue + button, then click Add users.
Step 5: Enter the email address for the user’s Google Account (their Google email address or the company email address). Select Notify new users by email to send a message to the user. Select the permissions you want. (Learn more about permissions here).
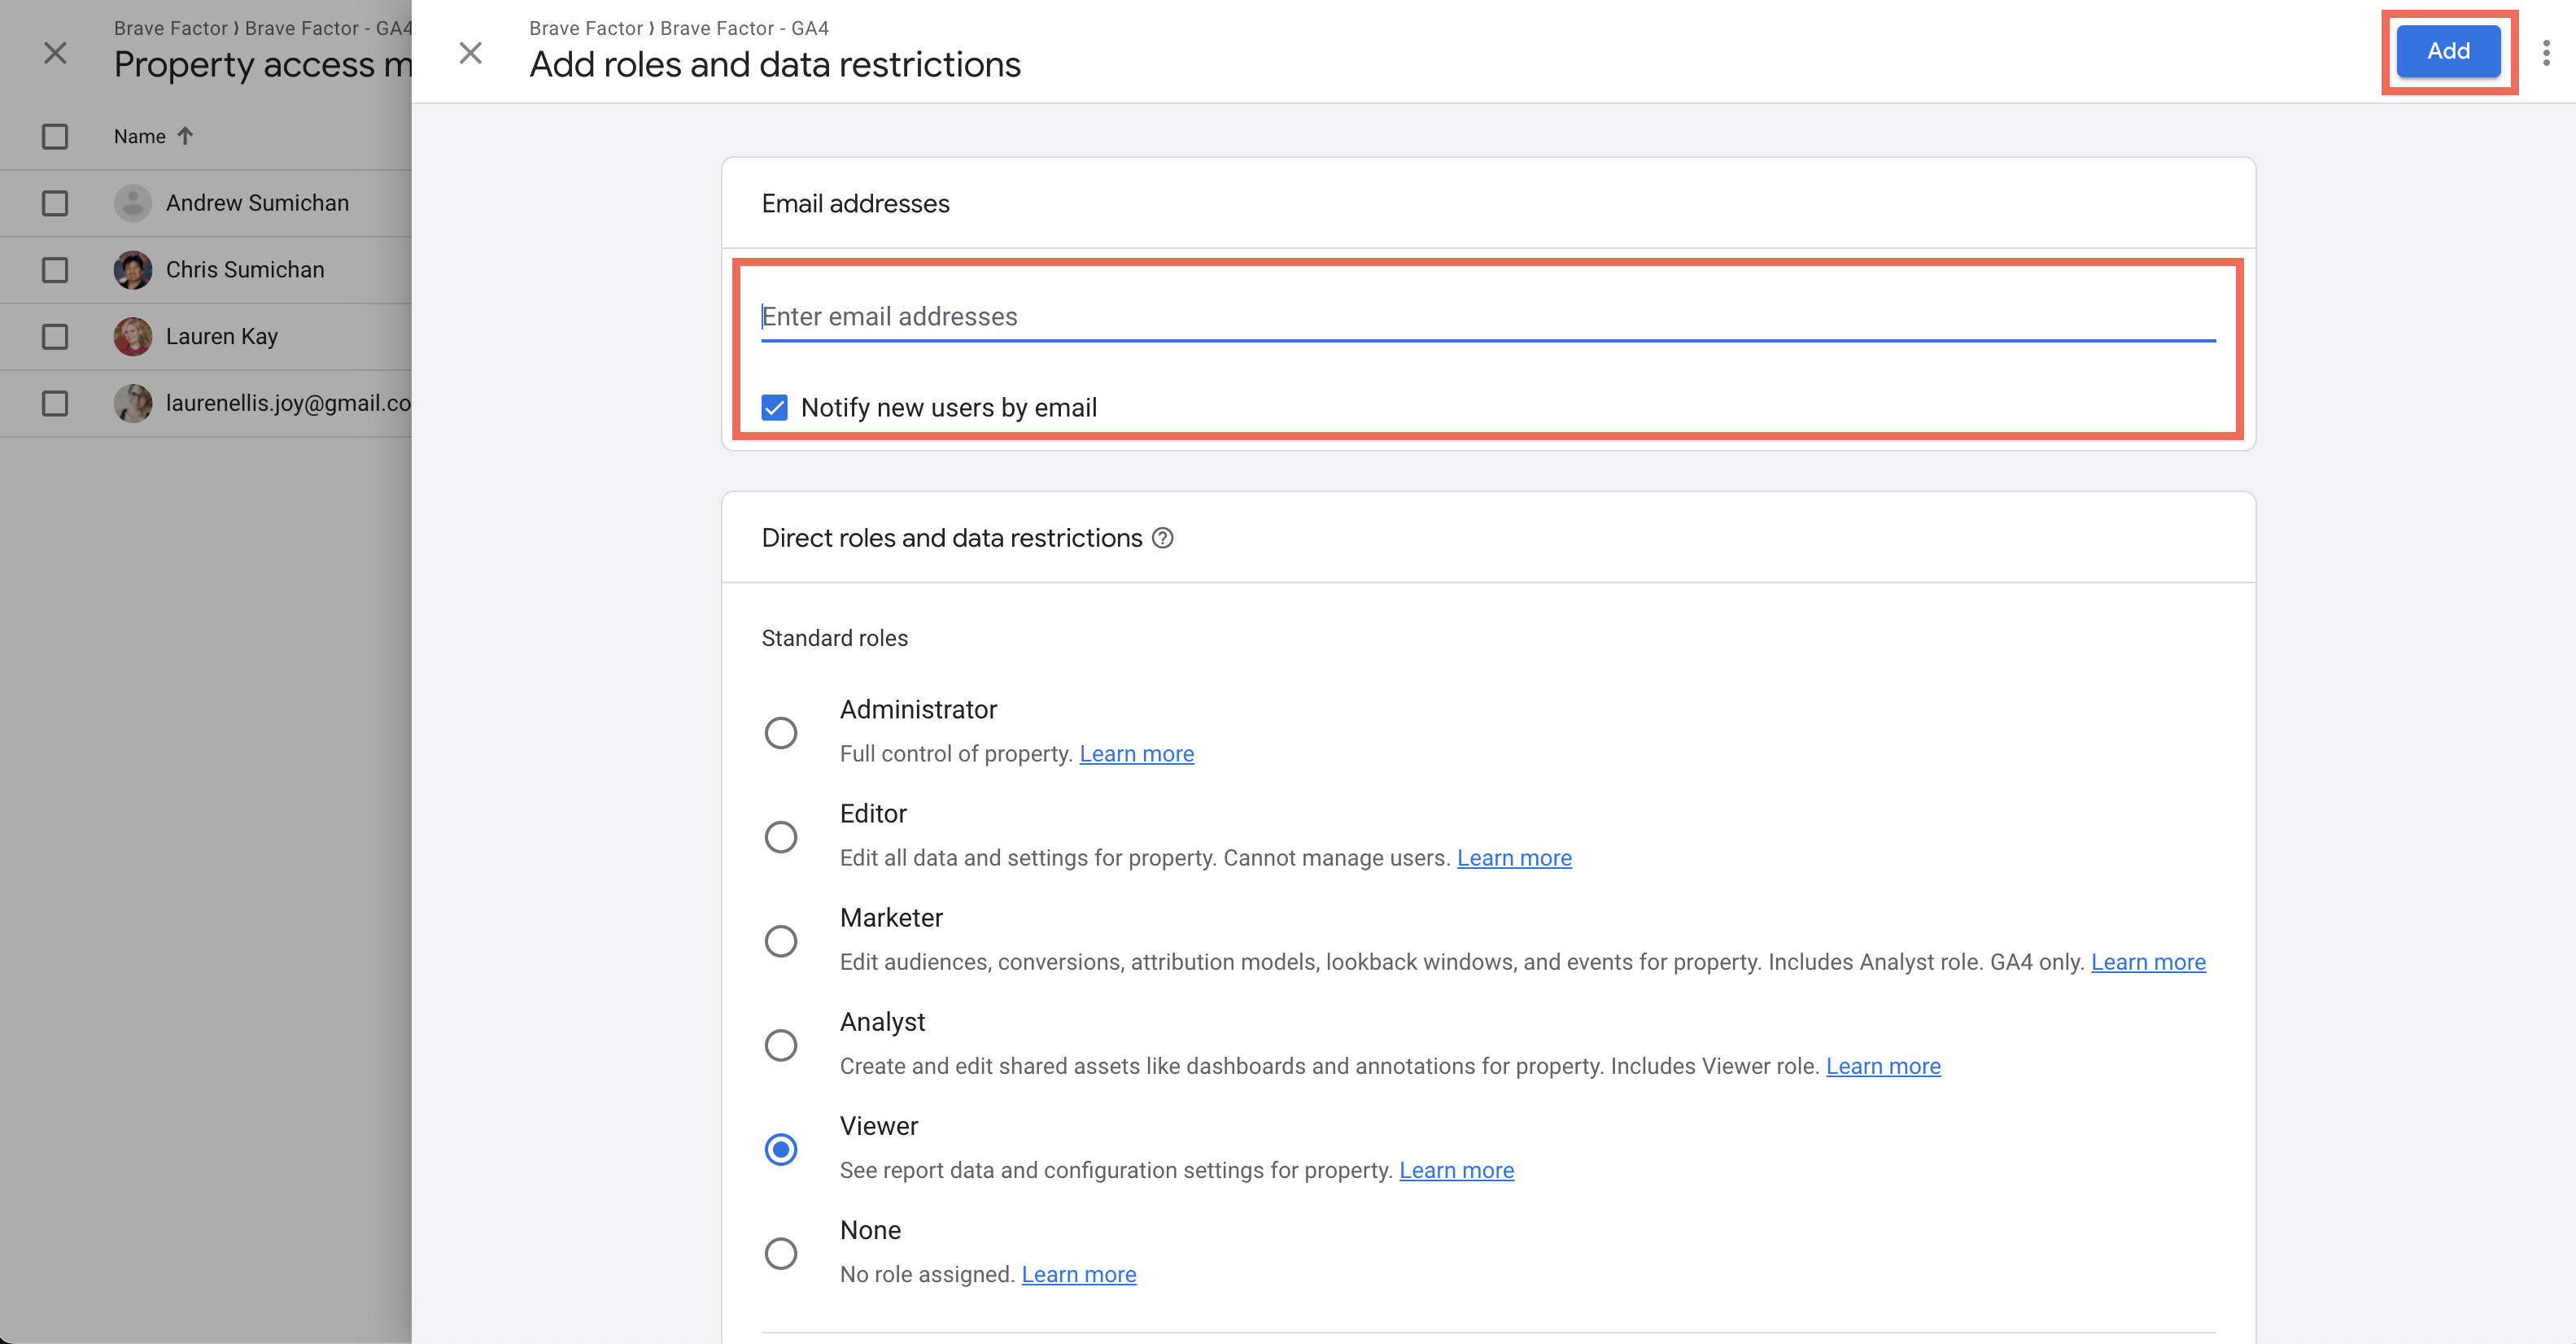
Step 6: Then just click Add.
It’s that easy!